
https://www.socialmediaexaminer.com/wp-content/uploads/2018/03/five-font-options-for-Instagram-Stories.png [ad_1]
Want more ways to make your Instagram stories stand out?
Have you explored the font tools in Instagram’s Type Mode?
In this article, you’ll discover how to use Instagram’s Type Mode to edit the colors, backgrounds, and alignment of text in your stories.
How to Use Instagram Type Mode in Instagram Stories by Jenn Herman on Social Media Examiner.
#1: Explore All 5 Font Styles
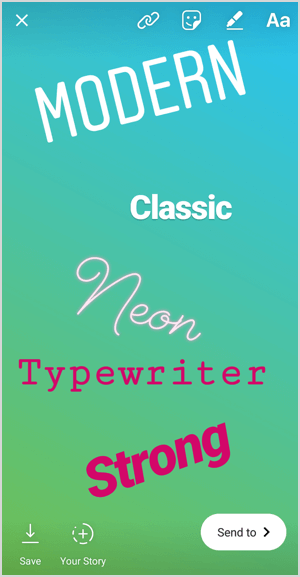
In addition to the existing standard font style, now referred to as Classic, Instagram’s Type Mode gives Stories publishers four new font styles to choose from: Modern, Neon, Typewriter, and Strong.
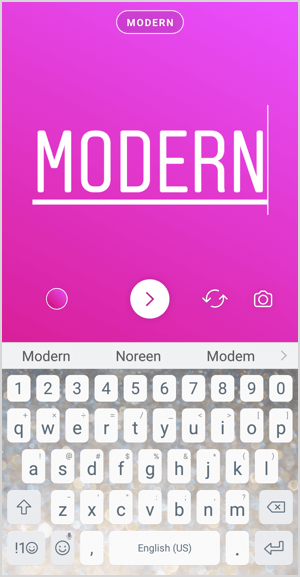
Modern is an all-caps font with a (not surprisingly) modern styling. It’s bold but not overbearing. This font is good for many brands, especially those brands with a modern style.
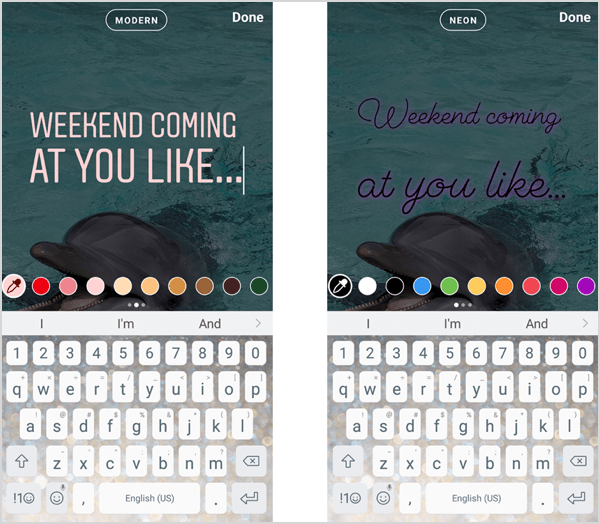
Neon is a cursive and bright font, resembling a neon sign. The font has a more feminine feel and may appeal to a younger audience. It may also be good for a brand that’s carefree or fun loving.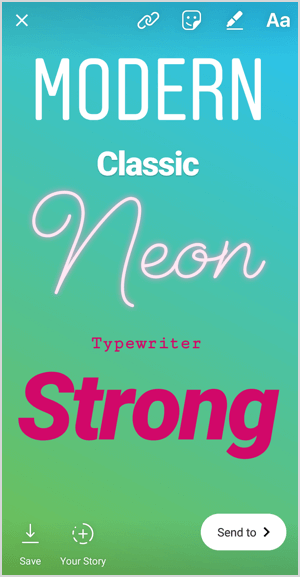
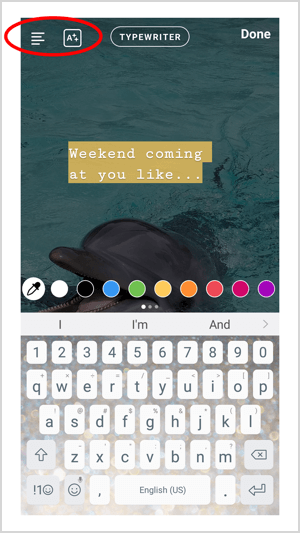
Typewriter is a traditional, simple font. If your brand is quirky, casual, or about simplicity, this font would be a great choice.
Strong is what it says: bold and large, and the italics give it an edgier vibe. This font is ideal if you want to make a bold statement or if your brand aligns with loud, proud, powerful styling.
Pro Tip: Calls to action or other statements that should stand out in your story are best served in Classic, Modern, or Strong font choices.
Although each of these fonts has a style of its own, you might consider using different fonts for different types of messages or purposes in your stories. As always, be sure to test each font to see which resonate more with your audience or drive more engagement on your stories.
#2: Edit Font Colors
After you choose one of the five font options, you can edit your text for additional styling and color options.
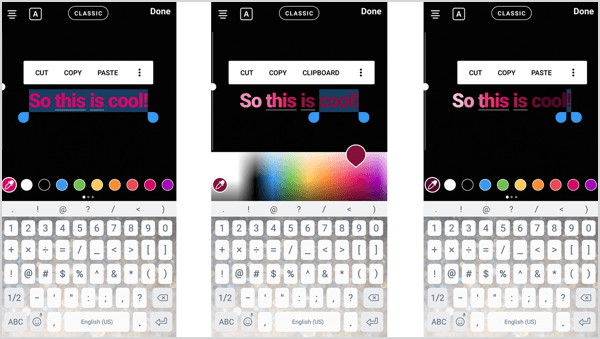
To choose a color for the text, select the color of your font from the color bubbles at the bottom of the screen. Or tap and hold any color bubble to open the color spectrum and choose a custom color.
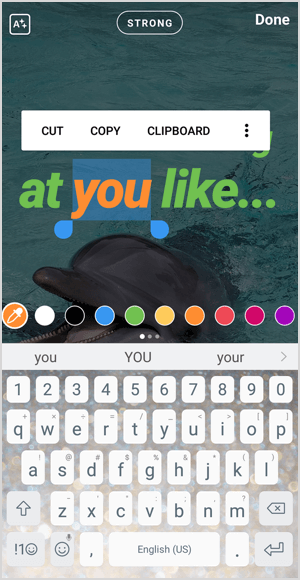
You can change the color of specific letters or words in your text by highlighting that letter or word and tapping on a different color.
You can even create a gradient effect in your text. Tap and select the entire range of text on the line you wish to grade, and then tap and hold any color bubble to open the color spectrum. You’ll need to use both hands for the next step. Simultaneously, with one hand, drag your finger across the text, and with the other hand, drag the other finger across the color spectrum in the direction you want the gradient to appear.
#3: Change Font Size and Justification
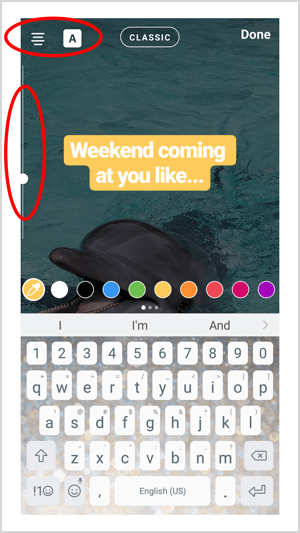
The Classic font defaults to a set font size. You can adjust the size of the font by using the toggle bar on the left side of the screen when you type.
To change the justification, tap on the alignment option in the top-left corner to change to left-, center-, or right-aligned text.
You can also tap on the A in the box icon to add a colored text box around your text. Tap on the A again to make the box transparent.
The Modern and Neon fonts are always fully justified and will adjust in size to fit on the whole width of the text line. To avoid having one line of small font and another line of large font, space out your text using the return/enter key.

The Typewriter font is one size and defaults to left-justified. You can change the justification to center- or right-justified by tapping on the alignment button in the top-left corner. You can also add a colored text box to the text by tapping on the A with the stars icon in the top-left corner.
The Strong font, like the Modern and Neon fonts, will always be fully justified. You can add a colored text box to it by selecting the A with the stars icon in the top-left corner.

#4: Create a Text-Only Story
Instagram has realized that sometimes we just want to share a text update in a story. In the past, to do this you had to actually take a photo to start the story post, overlay the image with a color, and then add text to the post.
With this latest update and the introduction of font choices, you can now easily create a text-only post.
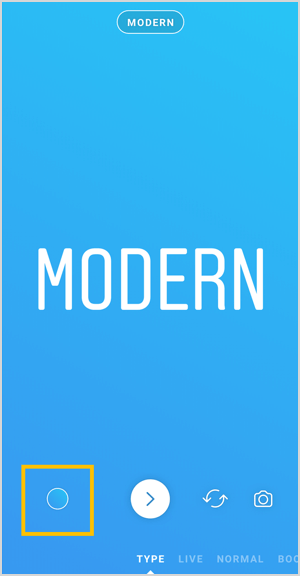
To get started, open Instagram Stories, and from the bottom list of options, slide to the Text option on the far left.
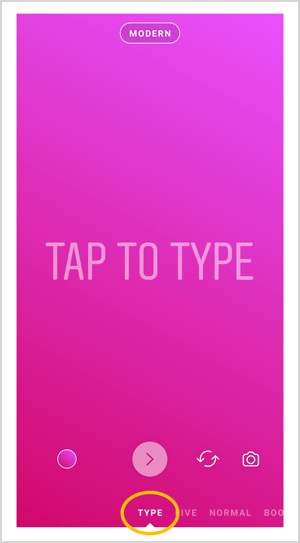
The text option defaults to Modern. To choose a different font, tap on the Modern button at the top of the screen and toggle through the four new fonts to choose the one you want to use.
Note: You can’t use the Classic font when you use the Text feature to create text in a story.

To apply your text, simply tap on the screen where it says Tap to Type and type the text you want to include.
You can also change the background gradient color for your text. Each text option has different color gradients. Tap on the colored circle in the bottom-left corner of the screen to navigate through the different color options.
When you’re done with your text and background color selection, tap the arrow in the circle to make your text a story.
![]()
This moves your text-based post into Story mode, where you can edit it in the same way you would any other story. You can move the text box’s location, pinch to change its size, or rotate it. You can also add stickers, more text, location tags, filters, and more.
When you’re ready, upload your story as usual.
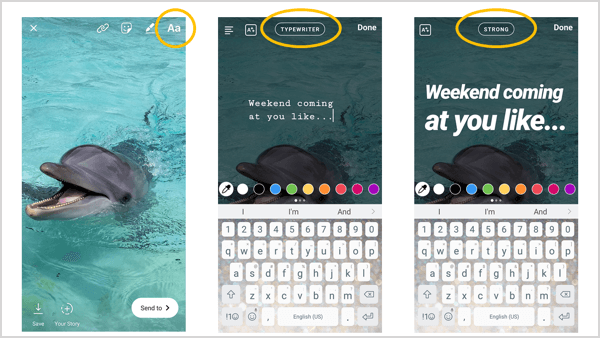
#5: Add Text to a Photo or Video Story
You can also add text to a standard photo or video story, or even a Boomerang story.
Simply create your story and choose the Aa button from the top-right corner. Tap on the font name at the top of the screen and select the font option to add your text. You can toggle through each font option, including Classic, to see how your text will appear on your post.
Conclusion
Your Instagram stories should represent your brand, voice, style, and personality. Find the font styles that best suit your brand and you’ll be better able to create a brand experience for your audience on Instagram.

What do you think? Have you found a font or style that best represents your brand? Have you tried mixing font styles to get a different effect? Please share your thoughts or tips in the comments below.
[ad_2]
Read_more MMO mastermind
No comments:
Post a Comment